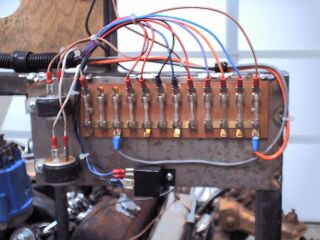
I got a little cheapy soldering iron and after I check everything for the third time I'll hook it all up for good. I'll be able to unplug the connectors from the steering column and then roll all the wires up until I put the body back on the frame. Here's the fuse block with the turn signal flasher, emergency 4-way flasher and horn relay hooked up. Also, I'm mounting the gauges on a board for now. After I get the frame back from the powder-coaters the plan is to make the car drivable without the body on it, so if anything pops up that needs to be redone I don't have to climb all over the body to do it.
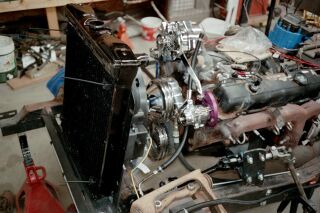
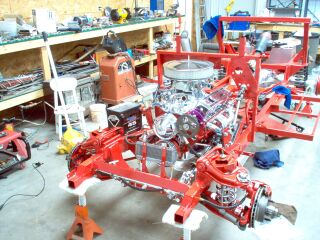
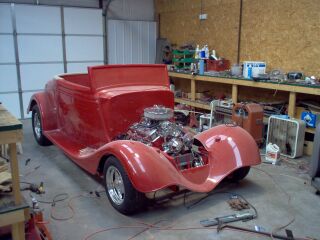
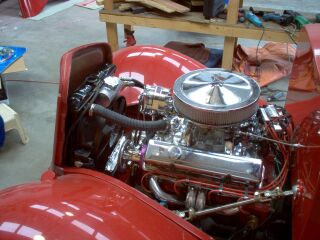
Here's the radiator mounted with the fan attached. You can see the transmission cooler mounted on the cross-member just behind the fan.
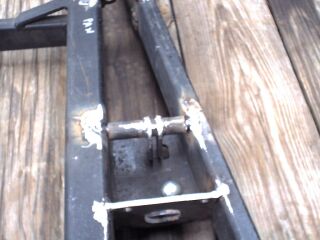
Here's a little bellcrank I had to make for the brake master cylinder. The brake pedal will be mounted on the frame and the rod to the master cylinder comes up at a slight angle, throwing the plunger in a bind. This bellcrank attaches it all.
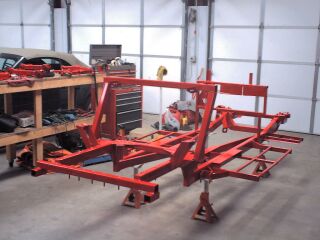
Got the frame back from the powdercoater. You just can't make a street rod too red. Here it is before and after bolting in the painted-up rear end.


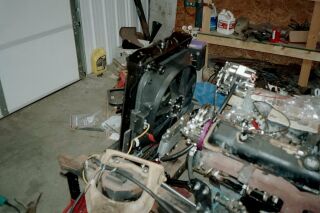
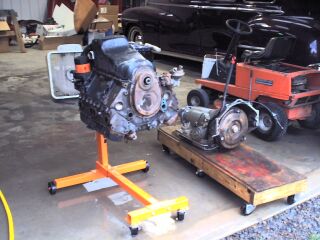
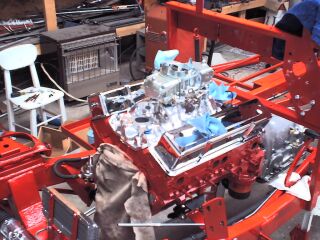
Here's the engine and transmission after a final bath before I wire-brush them down to bare metal and then paint.
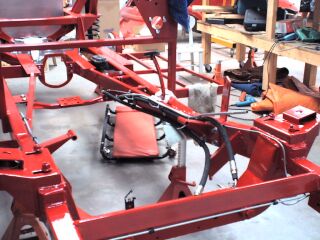
Here's a shot from a different angle of the plumbing for the Hydro-Boost power brakes/power system. The pressure goes from the power steering pump back to the Hydro-Boost unit under the driver's seat. That is the power for the power brakes. From there it goes back up to the Thunderbird power steering rack. There is also a bleeder line for excess pressure that will "T" into the return line from the power steering rack. Also, the fuel tank in to make sure it's clearing the fuel line, suspension links, etc.

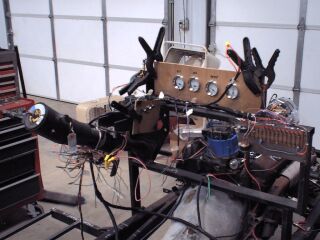
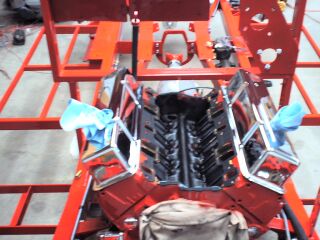
This motor was remarkably clean on the inside. Here's a shot of the valley. All I did was lay down some shop rags in here while I cleaned off the old intake manifold gaskets. I've found evidence that this motor is a fairly recent Goodwrench crate motor. Studs instead of bolts holding the valve covers on, and a bolt "girdle", a plate helping the oil pan bolts to press evenly on the pan. I've never seen one of those before.
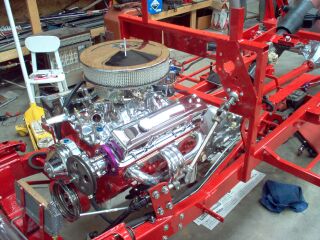
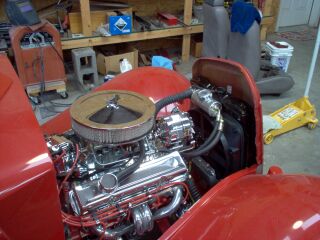
Starting to bolt on the chrome goodies, plus the Mustang front suspension and the transmission cooler.
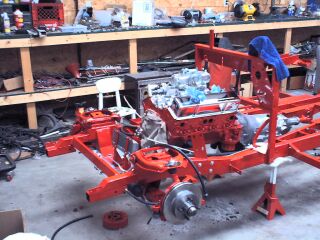
Here's some of the goodies in place. Including the chrome springs and shocks. It's going to be a shame to put fenders over all this.


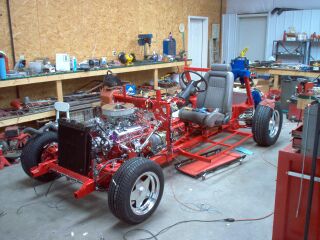
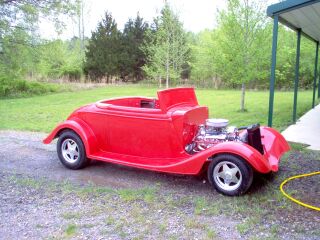
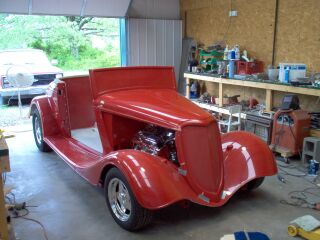
Finally found a set of nice looking wheels that would fit the 4-lug hubs. Got the car down on the wheels and finishing up the wiring. I'll get that done, fire the motor to make sure it's OK, then it's off to the muffler shop.
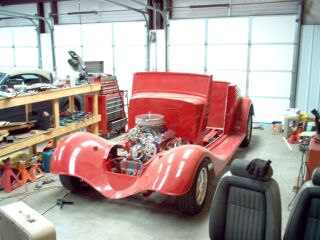
Got Dr. Tom, his son, and another guy to come over and put the body on the frame. All that work on making the frame, etc. all pretty is covered up now. You can barely see how the front of the body is held to the frame with the two little bolts on the flat surface between the front fenders. In the rear, I had to drill two 1-3/4" holes for the bumper brackets. They insert into matching tubes on the frame and hold the body in the right place back there. I meant to take a picture of the exhaust system before the body went on, but I forgot. It's pretty simple, though. Off the headers and down just outside of the frame under the running boards. When it's done I'll get a fancy chrome baloney tip to come out just ahead of the rear wheels.


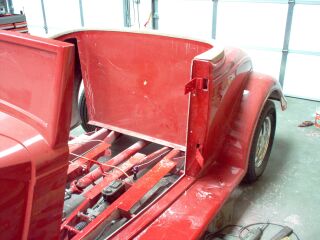
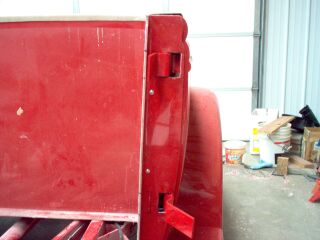
Well, I can't put it off any more, it's time to hang the doors. I'm really out of my element here, never worked with fiberglass and sure never hung doors in a car. So far, so pretty good, though. Here's the hinges sticking out of the door jamb and the post that the hinges attach to.
Here's the door in place with paint sticks holding the gaps that I hope are still right when the door is actually hung.
I clamped a piece of plywood to the hinges to make sure they both open to the edges of the slots I cut.
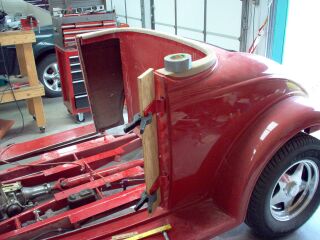
The door won't open as far as I would like, but to notch the body any more means I have to get out into the area where you can see the slot when the door is closed. There will be enough room to get in and out of the car though.
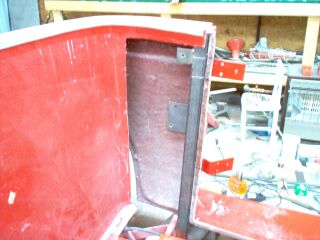
The passenger side door didn't fit in the hole as well as the driver's side. I had to trim about 1/8 inch off the back of the door. Got the latch installed and it fits pretty well.
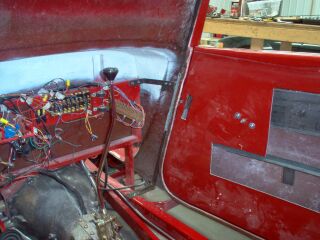
Here's the door striker plate installed. You can see where the brace goes from the frame to the top of the windshield and forward to the firewall bulkhead. I put some Bondo in the little gap between the plate and the inside of the doorjamb and also welded a piece of 3/16" steel to the back of the plate. So the striker bolt that goes into the door latch when the door is closed is fastened to 1/4" of fiberglass, about 1/4" of Bondo and 3/8" of steel. Sounds nice when the door is closed. Click -- Click.
I'll get Jay, the local pro welder, to come and weld all the brackets that are now bolted to the frame.
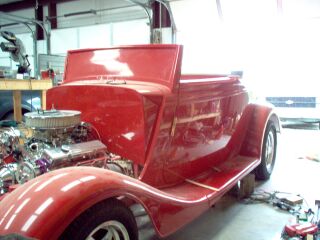
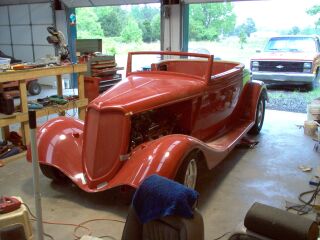
I couldn't stand it any more. Backed it out of the shop to rinse off all the fiberglas dust. Looks redder without that coating of dust. Also got the radiator mounted.

Finally figured out a place to mount the power steering reservoir. The fan shroud is nice and sturdy and has a flat spot on top, so I used two 1/4" bolts to hold it on. The big hose goes to the pump and the small one is the return from the power steering rack.
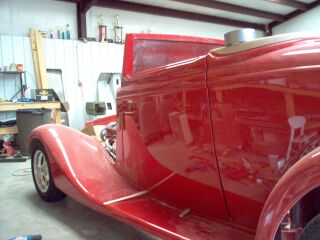
I taped the grill shell in place and laid the hood on to make sure it all fits. Pretty close. I plan to run the car without the side panels between the hood and fenders. I figure all that chrome stuff needs to be out there where you can see it.
I took the doors off one more time to try to get them up a little in front. I need about 1/8" to make the body lines just right. If I get it, that's great, but this is the last time I'm doing these doors. Also, I cut out the fiberglass inside the windshield frame.
Go on to page four.