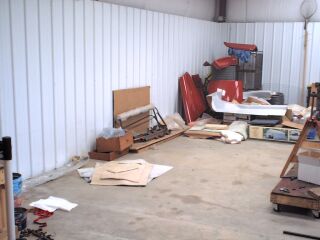
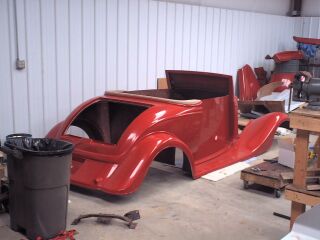
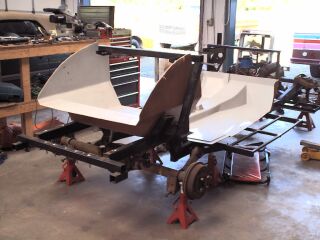
Well, moved all the stuff and ready to set the body down here.
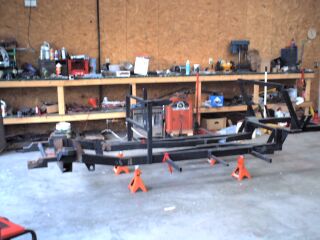
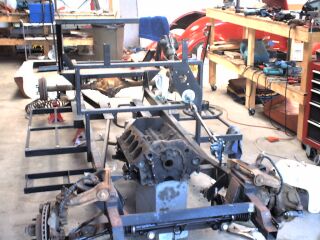
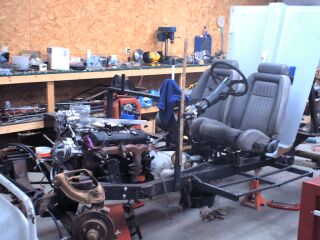
Here's the frame ready to start bolting stuff to.

Whoops, first problem. I went to bolt on the Mustang II front end and
found that the struts don't meet up with the brackets. Here's a couple
of pics to show how far off they are.
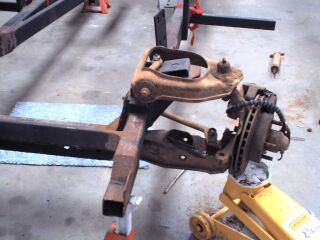
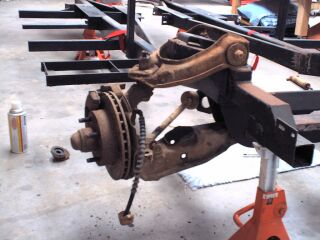
I found out that there are two kinds of struts. One that angles at 45 degrees
and one that angles at 52 degrees. News to me, but I'll get out the torch and
my special re-tempering water and correct the bend.
It's just too hot to even think about firing up the torch, so I move to the
rear. Here's the rear end hooked up.
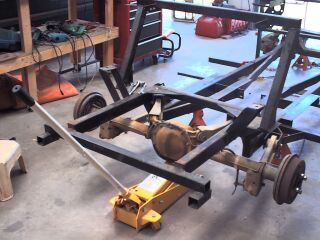
A quick word from an old Chevy guy. See the struts at odd angles on the top
of the rear end? That's Ford's way of not having to put in a Panhard bar to keep
the rear end from shifting side to side and also to control torque from twisting
the axle on hard accelerating or braking. That's Ford for you. Put in two
struts so you don't have to put in one. And as far as controlling torque goes,
the Mustang GT's have an additional shock on each side mounted in a horizontal
position behind the axle because the axle was twisting anyway. Problem was, if
you put tires on the rear that are fatter than stock you have to take off these
shocks because they are in the way.
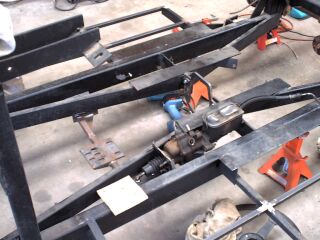
Enough of my sermon. Back to work. The rear end went in quick, about 25 minutes
start to finish. Only problem is the brackets on the frame that hold the lower
control arms. The inside of the bracket is so close to the frame that the original
bolts and nuts won't work. Off to NAPA for different ones. Had to get a torque
socket for the shock mount bolts anyway.
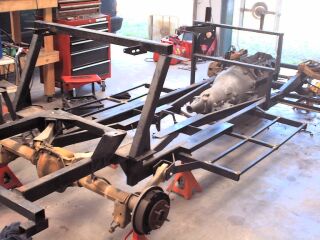
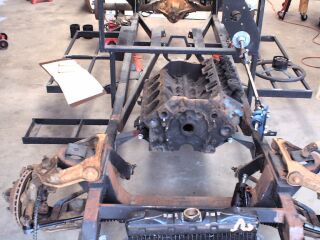
Here's another view. I have my old dead block and transmission case sitting in
place to make sure mounts, etc. line up.

The braces that fit under the running boards were simply square tubing coming
straight out from the frame. I had some 3/4" square tubing laying around the shop
anyway, so I made a stronger platform for the running boards to sit on top of.
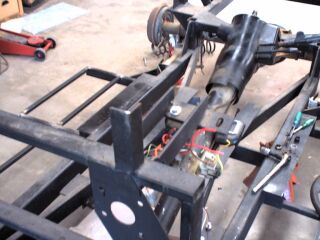
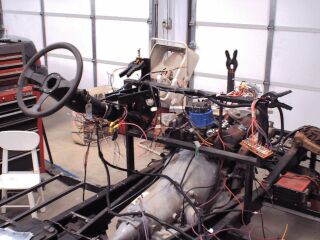
Here's a illustration of you learn something every day. I thought GM steering
columns from the 70's - 80's were all pretty much the same. Guess not. This column
came out of a mid-80's Firebird and it doesn't fit the bracket that was already
part of the frame. Misses by about 1-1/2 inch. Can't take it back, so it becomes
a learning tool in setting up the steering until I get another column. Also, looks
like I'm missing the link between the pillow blocks and the steering rack.
I finally got the motor mounts in. The mounts that I got with the car were for
a Ford motor I guess. They were close to fitting but not close enough. For days I
swore I must have the wrong mounts that bolt to the block. Finally I ordered a pair
of Chevy frame brackets and with just a little nudging it went right together. I also
put a cylinder head on the driver's side to make sure the steering is going to clear.
I ordered a water pump and headers from Speedway and as soon as they get here I'll
bolt them on to make sure everything clears.
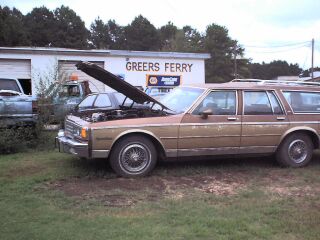
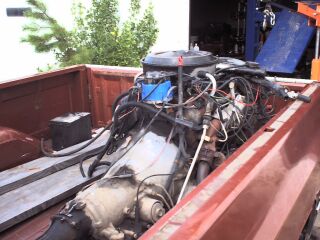
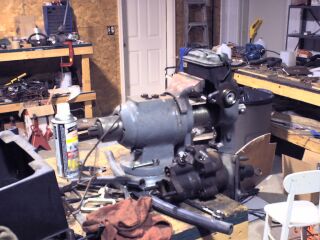
Found a donor car for the running gear. 1985 Chevy Caprice wagon with a 305/700R.
Shows 81,000 miles but I doubt it. Here it is from driving to resting in the back of my truck.
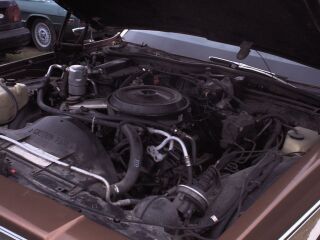
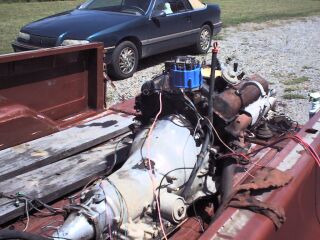
By 1985 Detroit was heavily into pipes and tubes and wires and pumps and everything in the name of ridding the planet of pollution. That stuff has to go.
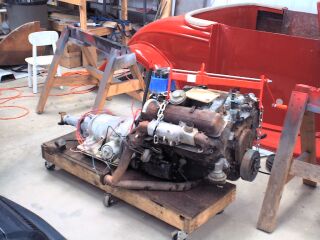
It's gone. Used a couple of jugs of degreaser while the motor was still in the back of the truck and then transferred it to my little "motor scooter".
I took the "Hydro-Boost" power brake system off the Chevy wagon. It works off the power steering pump instead of using a vacuum booster. Looks like it will fit under the driver's seat without having to chop up the frame. Hope so, we'll see.
Hmmm. This might be some good luck for a change. I took off the booster and turned it upside-down. Fits just the same. This will let me mount the master cylinder with the hydraulic lines coming out the bottom, making a hard 90 degree angle turn to the front of the car, running along the frame rails.

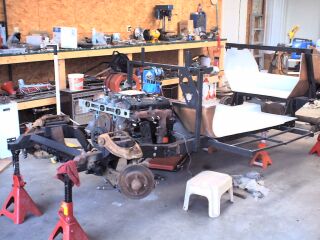
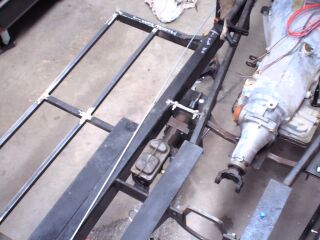
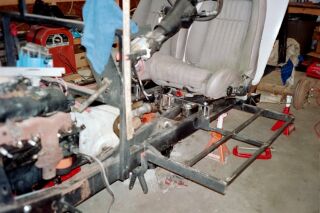
I put the engine in the frame to make sure of all the clearances and motor mounts, etc. Turned out that the 700R4 overdrive transmission is a couple of inches longer than the Turbo 350 the car is built for so I had to turn the real mount around and drill another hole in it. Worked out OK. The transmission is also just plain bigger. Side to side I know and though maybe also top to bottom, so I laid the floor pan and trunk liner in place just to make sure everything is still clearing. All OK.
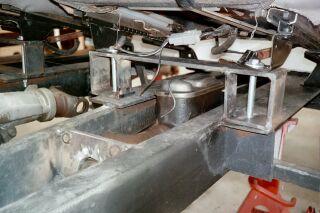
Here's the brake master cylinder and power brake booster mostly installed. It sits under the front part of the driver's seat and sticks up about an inch so I'll have to cut the floor pan and make a little trap door for it. Then I'll have to rig the driver's seat so it will tip forward or back (whichever makes the most sense) to check the master cylinder fluid. The hydraulic lines run from the power steering pump along the frame rail back to the brake booster then back up to the power steering rack then back to the pump.
I found a salvage yard with a good steering column and a pair of decent Mustang bucket seats. Here I have the floor pan standing up behind them while I make and mount the seat brackets.
The master cylinder is tucked under the driver's seat, couldn't have turned out better. I'll make a trap door in front of the seat to hide it and to check and fill it with a little funnel.
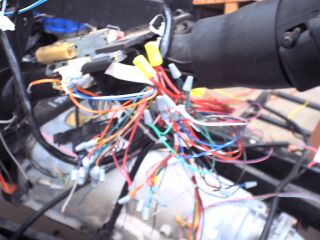
Anytime I want to remind myself how stupid and easily frustrated I am, I just wire a car. This car came with a generic wiring harness that pretty much matched the directions in the manual. I decided to wire-nut everything together and test it all before going any further. It's a rat's nest of wire.

Go on to page three.